Recording a Purchase Bill (Add Expense Entry)
A purchase bill or expense invoice is recorded in Finac from the Add Expense Entry screen. The usual route is to upload the bill as a PDF or image and let Finac read the supplier, date, number, line items and tax from it; the same screen also accepts a bill typed in by hand. This article walks through the screen section by section, from the upload to the approval controls, and explains what each field does.
On this page
- Opening Add Expense Entry
- Uploading the bill
- Primary Details
- Item Details
- Payment Details and approval
- After submitting
- Frequently asked questions
Opening Add Expense Entry
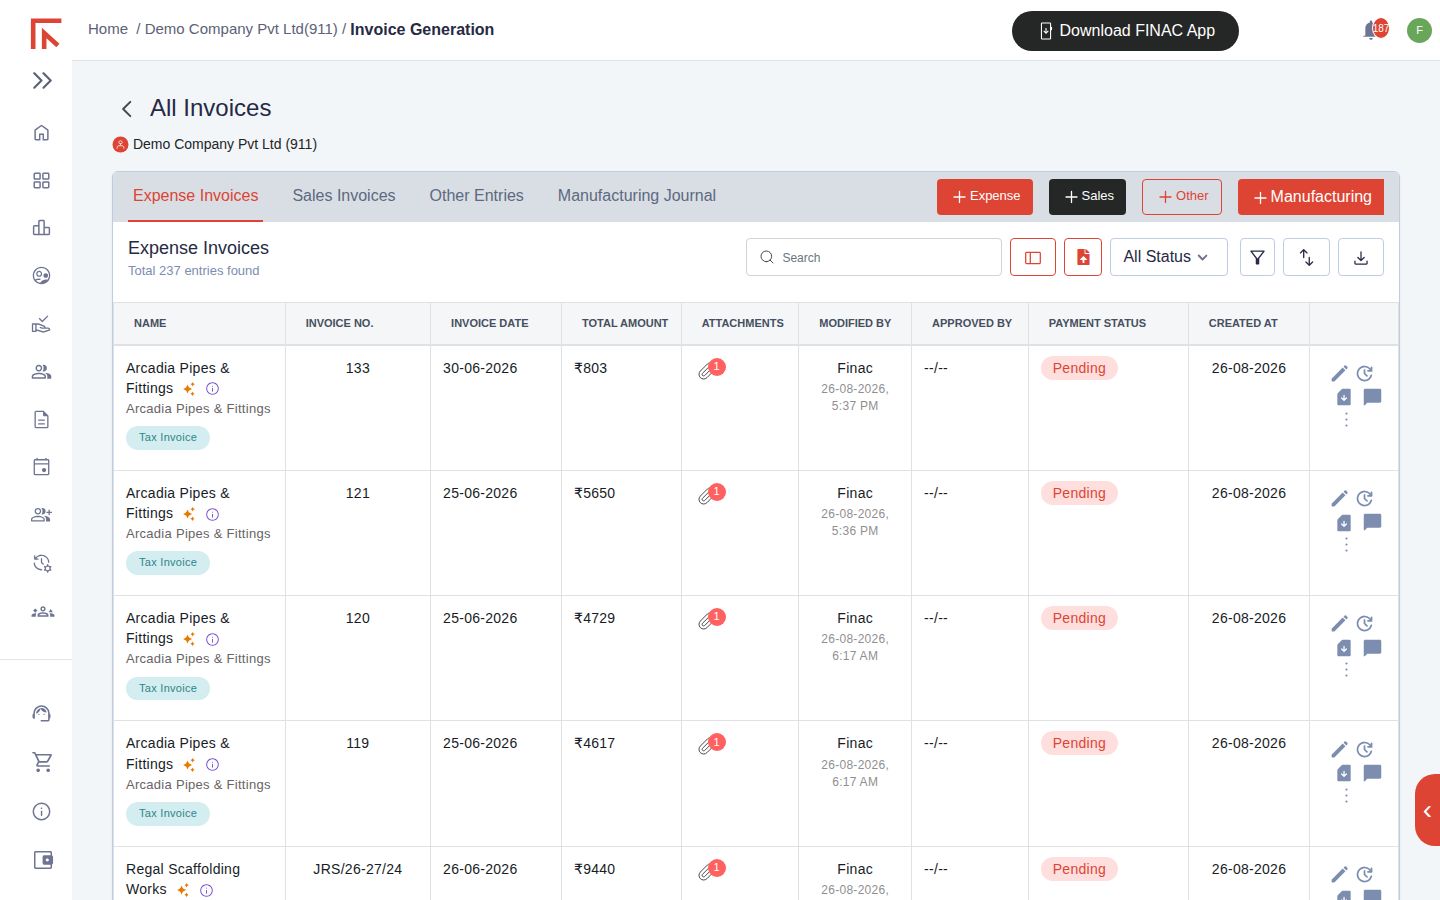
- Open the client and select Invoicing Advanced on the Client Dashboard.
- Select the + Expense button at the top right of the invoice list.
Uploading the bill
The top of the screen is the upload panel. Select Upload File or Image and choose the bill. Finac reads the document and fills the Primary Details and Item Details below from it; the file itself is attached to the entry so it can be opened from the invoice list later. Check the filled fields against the bill before moving on, particularly the supplier, the invoice number and the place of supply.
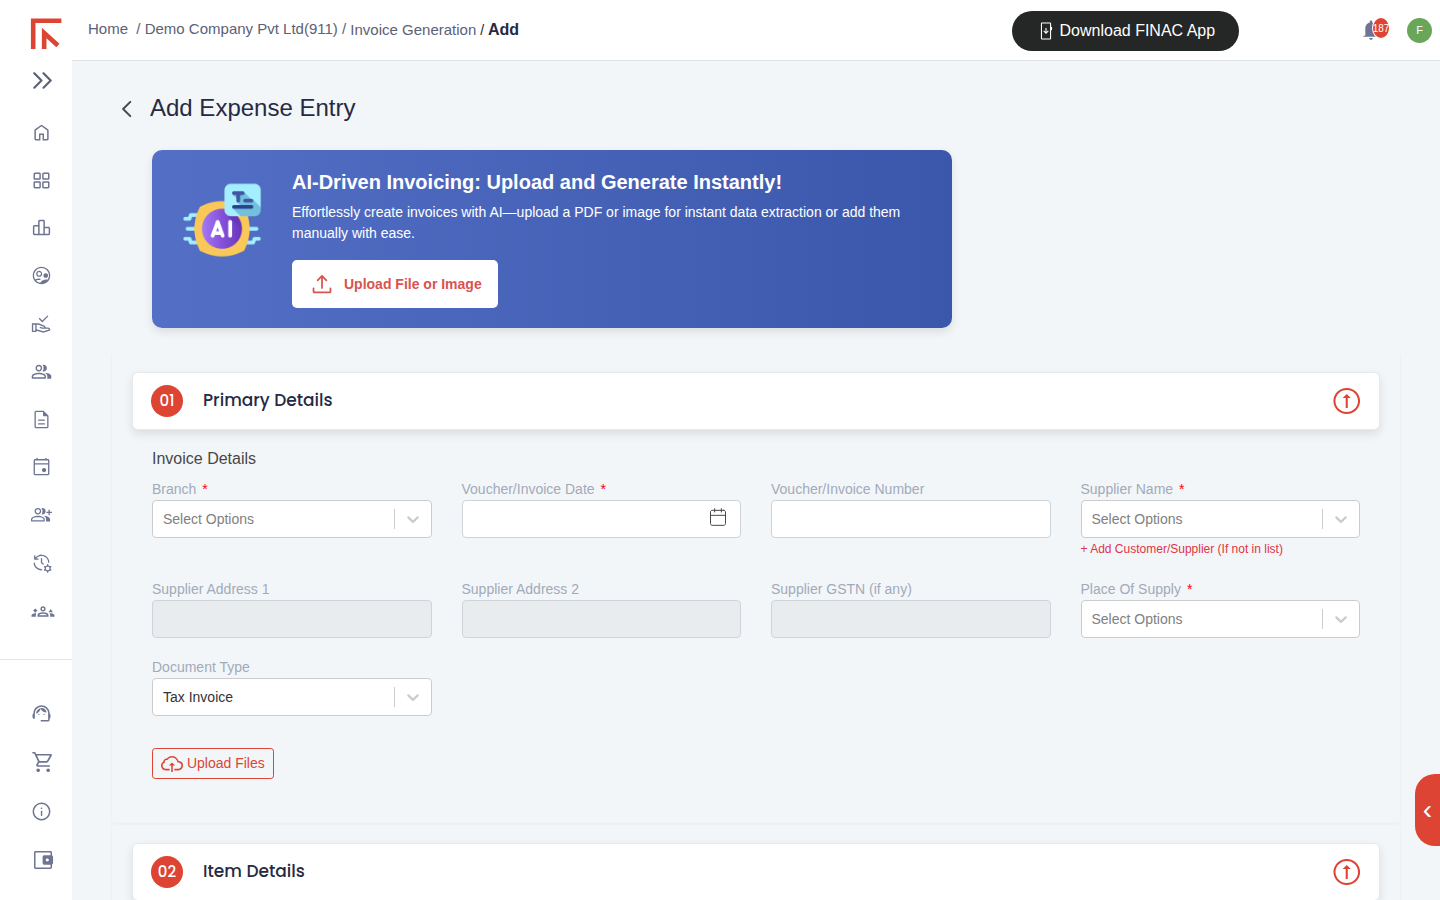
To record a bill without a file, skip the upload and complete the sections by hand. A file can still be attached later with Upload Files at the foot of Primary Details.
Primary Details
| Field | What to enter |
|---|---|
| Branch | The business address of the client the bill belongs to. Drives the GSTIN used for input tax credit. |
| Voucher/Invoice Date | The date printed on the supplier's bill. |
| Voucher/Invoice Number | The supplier's bill number, exactly as printed. Used to detect duplicate bills. |
| Supplier Name | Pick from the Customers/Suppliers list. If the supplier is new, use + Add Customer/Supplier to create the record without leaving the screen. |
| Supplier Address 1 and 2, Supplier GSTN | Filled from the supplier record; edit if the bill shows a different address or GSTIN. |
| Place Of Supply | The state of supply. Determines whether IGST or CGST and SGST apply, so set it before entering item tax. |
| Document Type | Tax Invoice by default. Other document types, such as a bill of supply or debit note, are available from the list. |
Item Details
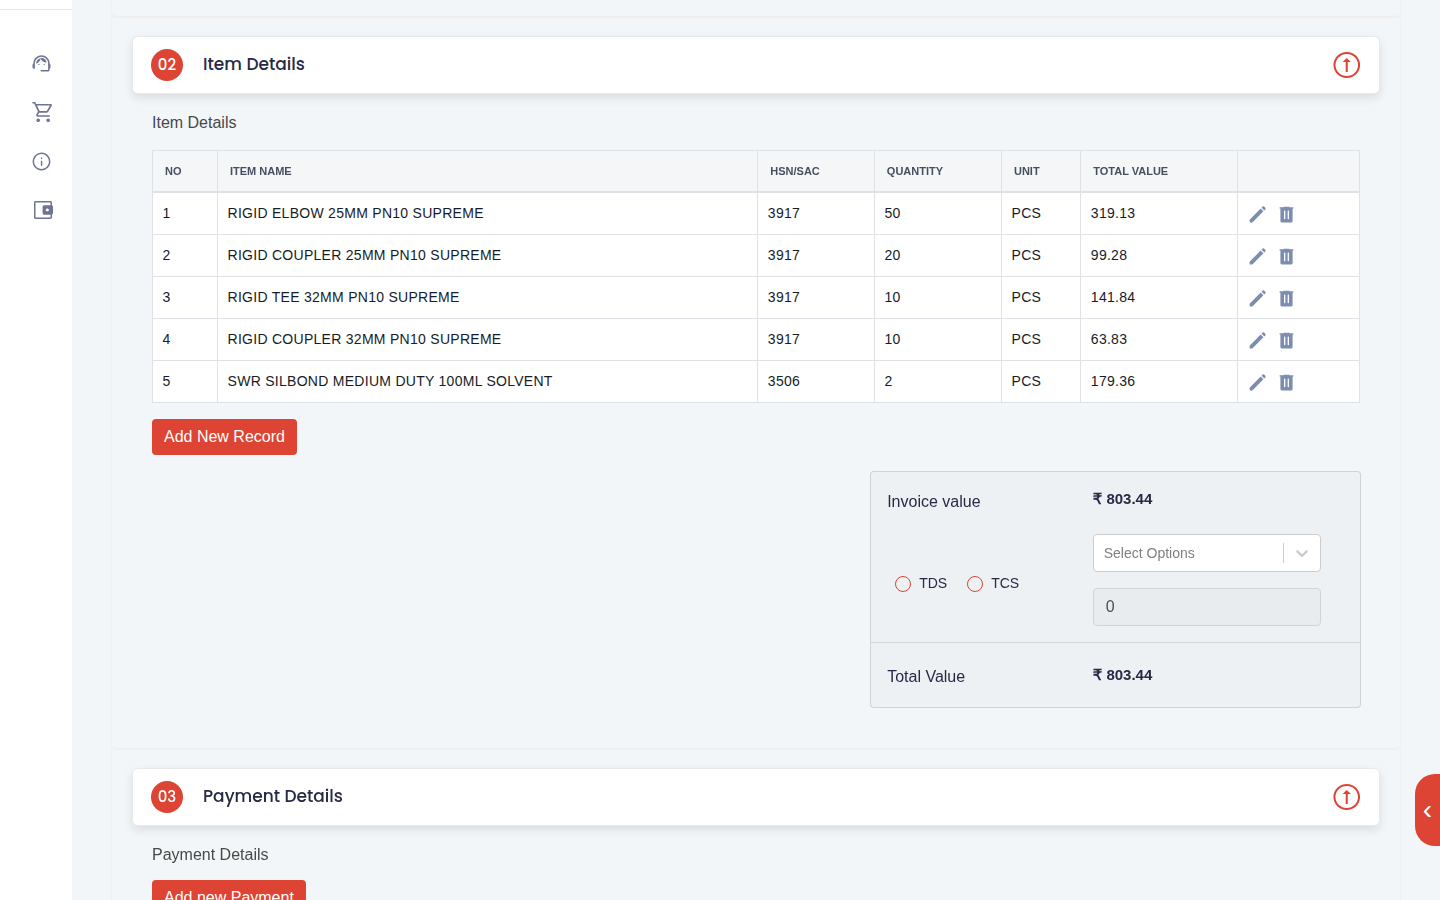
Each line of the bill is an item row. Rows filled from the upload can be edited with the pencil icon or removed with the bin icon. To add a row, select Add New Record.
| Field | Notes |
|---|---|
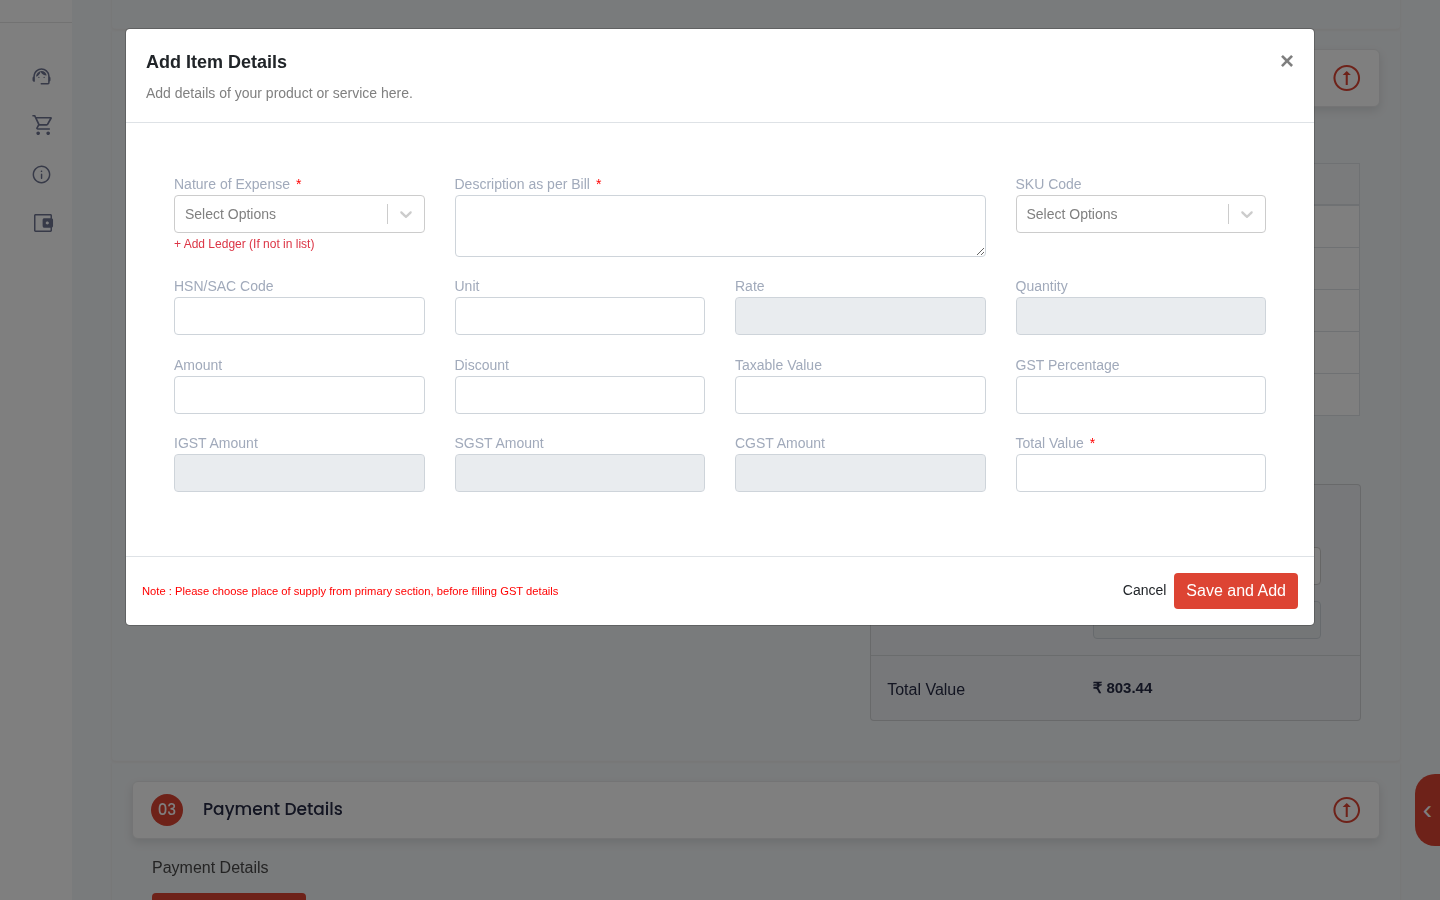
| Nature of Expense | The expense ledger to debit, for example Purchase Account or Professional Fees. Defaults from the supplier record where one is set. + Add Ledger creates a new head. |
| Description as per Bill | The line description as printed. |
| SKU Code, HSN/SAC Code, Unit | Stock item and classification. HSN or SAC is needed for GST reporting; the unit comes from Stock Manager. |
| Rate, Quantity, Amount, Discount, Taxable Value | Amount and Taxable Value calculate from rate, quantity and discount. |
| GST Percentage, IGST / SGST / CGST Amount | Enter the rate; the split follows the place of supply. |
| Total Value | The line total including tax. |
Select Save and Add to save the row and start another, or close the dialog when done. The Invoice value box under the table totals the rows; the TDS and TCS options apply a deduction or collection section to the bill and show the deducted amount, so that Total Value is the amount actually payable.
Payment Details and approval
If the bill has already been paid, record it under Payment Details with Add new Payment: the Net Payment Made, Mode of Payment, Date of Payment in Bank/Cash and the Narration in Bank Statement, which is what lets the payment match the bank transaction when the statement is uploaded. Leave it empty for an unpaid bill; the payment status shows as Pending and is updated when the payment appears in the bank statement.
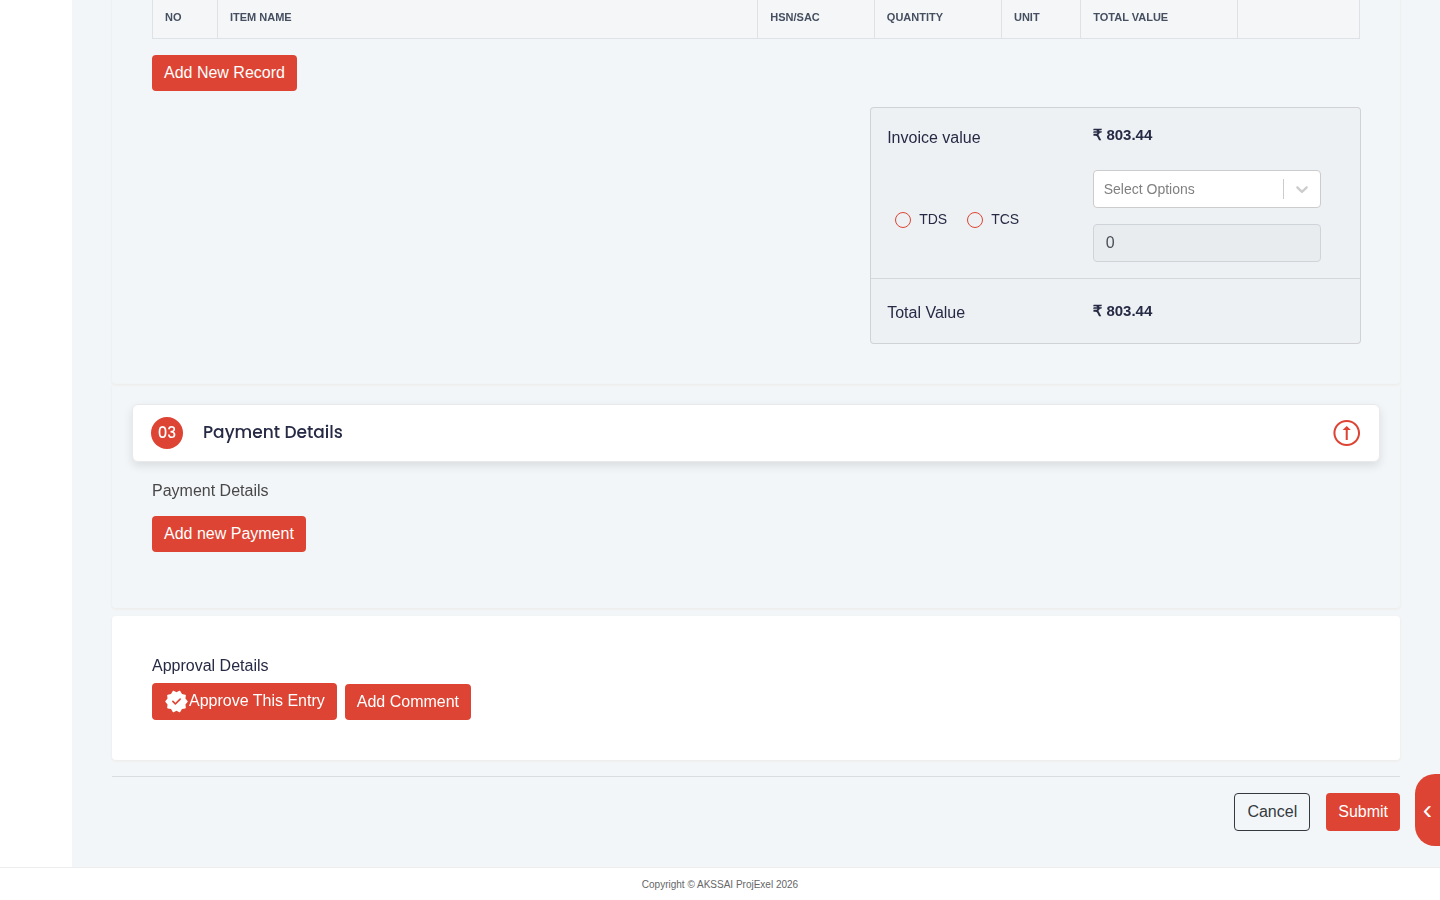
Under Approval Details, a user with approval rights selects Approve This Entry to sign the bill off; Add Comment attaches a note to the entry's comment thread. Select Submit to save.
After submitting
The bill appears on the Expense Invoices tab with an attachment badge, the user who created it under Modified By, the approver under Approved By once approved, and a Payment Status of Pending, Partial Paid or Paid. The entry posts to the supplier's ledger and the chosen expense head, and the tax lines feed the Input Tax Credit tab of the GST module for the period. Bills also flow into the TDS/TCS module when the supplier or line carries a TDS section.
Frequently asked questions
The supplier's name did not fill from the upload.
Some bills carry only a logo. Select the supplier from the list, or add it with + Add Customer/Supplier, and the rest of the entry proceeds as normal.
Can I add an item after the bill is submitted?
Open the bill with the pencil icon in the list, add the row under Item Details and submit again. Record all lines before the first submit where possible so the invoice value is complete from the start.
What happens if I record the same bill twice?
Finac checks the supplier, invoice number and date against existing entries and warns when a match is found.